Tuesday, February 28, 2012

DIY Bowtie Flats

Hello!
It's Jillybean, and I am here to bring you a simple DIY to jazz up your flats!
This DIY brought me back to my years as a ballerina. (I admit I wasn't good, but I had fun!) During the later years, split sole ballet shoes were a more serious ballet slipper. But you had to sew your own elastic straps on them! This DIY is kind of the same thing!

Things you need:
1. Pair of flats. (I bought mine at K-mart for 13 dollars!)
2. Pretty fabric (You will need 2/ 8x5 squares + 2/ 1x5 inch strips, I got a half of yard at Jo Ann's for 2.50!)
3. Scissors
4. Leather Sewing needle
5. Sewing Machine
6. Straight Pins
7. Sewing Ruler
8. Thread to match your choice of flats, and your choice of fabric!

1. Measure your elastic across the top of your shoe (with your foot inside!) Cut your strips to your size. (Remember, you are going to want to make this a bit tighter, loose elastic isn't comfortable, or not that great at holding your foot inside!) I wanted a perfect line across my flats with my elastic. So, I marked off with straight pins, and a sewing ruler.  Plus, this gives you a marking for later, when you need to keep the elastic in place.

2. (Dos! Deux! Whatever!) Measure your fabric for the bows. I used a tape measure, to cut out 2/ 8x5 squares. Reason for this: You will cut the fabric in half, and sew the two pieces together! Snip, Snip, Snip! You will also want to cut out 2 strips of 1/5 inches. This will be for your top of your bowtie. 

3.  Prepare your sewing machine! Thread your bobbin, etc. etc! Sew around the edges of your fabric. Make sure they are back to back, on the top side. Sew! Sew! Sew!! 

4. Show off your new sewed pieces to your mom, or get her to hold yours up for you and show them off. (I think my mom was thrilled at how well I picked up using a sewing machine!) 

At this point, you are so close to wearing your new flats out! So take a snack break if you choose or hang out with your lovely furry friend for a second, and carry on! 

5. Get your two piece of fabric to use for your top of your bowtie, and wrap them around your square piece of newly stitched fabric. (Little Jill Note: Fold your fabric over and under like an accordion to create more of a effect, and it also will make it easier to wrap the fabric around.) 

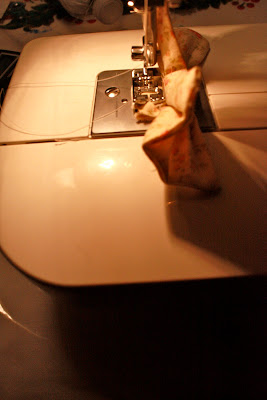
6. After you wrap the two around the fabric, take the pieces to your sewing machine. Sew right across the fabric. 

7. Take your elastic strands, and slip through the back of the bowtie. (Little Jill Note: I sewed a quick x- shape across the back to hold the elastic and the wrapped fabric in place on the elastic strap. But this step is completely up to you!) 


Now! You should have two elastic straps with bowties attached! Cute right!?
8. Thread your special leather sewing needle, and acquire your thimble. Keep your straight pin in the side of the shoe as long as you can to prevent the elastic from slipping, and not making a straight line. 

Repeat on the other shoe, and boom! A totally new flat!
Feel free to perfect your dance moves like myself or just wear them out!  Hehe enjoy!

Happy Crafting!
Jillybean

Snowy Brunching + Vintage Shopping

 It was quite a snowy Saturday morning when Mia, myself, and Noelle ventured out in their hometown, (20 minutes from my hometown) for a quick morning brunch and vintage hunting trip. 

First, we went to Sisters Restaurant where they were running a yummy breakfast special, Peanut Butter Cocoa french toast, and Butterscotch Pancakes. (This isn't vegan, just an FYI! I had coffee and home fries! But, how good does that all sound?) After staying until Sister's 1pm close, we finished up our coffee and headed down the street.  We headed to our first spot, Manjones Vintage and Collectibles.

Manjones is run by Nancy and Ann, the two cousins started their store just about a year ago.  When you walk in Manjones, it's safe to say you might just fall into a tizzy, and stay in their mock powder room for the rest of your days. Teal, pink, lace, and velvet keep the little section incredibly cozy. Us three ladies might have stayed in that room alone for about 20 minutes! I was thrilled to find some old perfume bottles, which have become my new collectible. The next two sections focus on the living space, and kitchen. Pyrex, pretty painted glasses and juice containers fill the shelves. You can even get your hands on vintage cookie jars! The clothes section however, is where we all snagged a cute piece! 


I did get a quick interview with Ann!

J: How long have you been located here in Hazleton?
A: 1 year! 

J: What are some good vintage clothing techniques you live by when choosing vintage pieces?
A; I try to look for pretty hats, dresses that age well, and are in good condition. I also try to keep elements of old and new, and that can be flattering!

J: Do you run this store by yourself or with others?
A: I run this store with my cousin Nancy, who shares an equal passion for vintage and collectibles.

J: Have you lived in Hazleton your whole life? 
A: No, I was living in Florida for most of my life, I just moved back to Hazleton 2 years ago!

J: Did you own any other vintage stores?
A: Yes, in Florida I owned 3 stores! 

J: Where do you find all your pretty vintage and collectibles?
A: We find most of our pieces for the store at estate sales! 

Thanks for taking some time to talk to us, Ann!

Next, we were on our way to Remember When on Broad St. Both of the stores can be described as department stores for vintage for sure. Remember When was equally as big, and seemed more focused towards women's clothing. But still did have a fair share of men's clothing as well.  When you first walk in, you see glass counters filled with jewelry! I fell in love with two pieces at this store! I have to say the one dress, is my all time favorite by far! Unfortunately, the owner said she will be moving soon! The store is 30% off as of right now.  The owner said she hopes to locate to Savannah, Georgia by May or June! Luckily, the owner said her daughter started an etsy store for her! If you click Remember When above, it will take you right to their etsy store, if you can't visit locally!

Happy shopping! 
Jillybean

Friday, February 17, 2012

My All Time Favorite Italian Cookie Recipe


Sew, this being a craft blog and all I am sure it is no surprise to you when I say, I think homemade gifts are simply the best, Especially, when it comes to gifting during a holiday that is about celebrating love! What better a time to gift something made from the heart with that special someone in mind. That being said, as a valentine present I decided to make my valentine one of his/our favorite Italian treats.

Italian cookies are a common treat found in my home at all holidays year round and have been a favorite of mine since I was a lil one. These cookies are absolutely delicious and more than simple and fairly cheep to make (I didn't even have to leave my house to pick up the ingredients). I would say that makes them a great go-to for a last minute bake sale item or pot luck.
*this recipe makes a large batch

Recipe For: Italian Cookies
Prep Time: 20 mins
Bake Time: 10-15 mins
Pre heat oven: 350

Ingredients
Cookies
2 cups of sugar
1/2 lb. of butter (2 sticks, soft not melted)
3 eggs
1lb. ricotta cheese
2 tsp. vanilla
4 cups of flour
1 tsp. baking soda
1 tsp. salt

Icing
1 box powdered sugar
1 stick of butter (soft not melted)
milk

Directions
1.) Mix together sugar, butter, eggs, & vanilla in one bowl.
2.) In other bowl mix flour, salt & baking soda.
3.) Mix bowls 1&2 together. Then add in the Ricotta Cheese mix till blended.
4.) Roll cookie mix into small round balls, place on cookie sheet & bake at 350 for 10-15 mins. (I bake mine for 10-12 for a moister cookie) 
5.) Take out of oven, cool completely then ice.

Icing Directions
stir powered sugar & butter till smooth wile adding a little milk at a time (you dont want runny icing) then add food coloring.


So there you have it, my all time favorite cookie recipe. 
I really hope you and your loved ones enjoy these delicious cookies as much as I do! 
Happy Baking -Mia


40 Ounces Of Koozie

40's, we all love em.. but those lil (or should I say big) buggers, tend to get warm and leave you feeling as if you have no choice but to batten down the hatches and chug one for the team. Luckily, there is an easy and fashionable crocheted solution, known as the koozie!


ch = chain
sc = single crochet


First off, you gotta collect the necessary Richards:
1.) Crochet hook (I used a size E or 3.50mm)
2.) Yarn (Red Heart is always a cheap and durable fave)
3.) Empty 40 oz bottle


1.) Ch 2
2.) 6 sc in the first ch
3.) 2 sc in each of the 6 existing sc's (you should have 12 sc)
4.) At this point it is helpful to use a piece of contrasting yarn to act as a marker for the first stitch of the next round so that you can watch the office while crocheting and laugh at the hilarity that is michael scott, without losing track of your counting.
5.) For the next round, make 2 sc in the next stitch followed by 1 sc in the next. Repeat this all the way around (2 sc, 1 sc, 2 sc etc..) until you have 18 sc completing that round.
6.) The next round will have 2 sc in the first stitch followed by 1 sc in the next two. Repeat to complete the round.
7.) Complete one more round with 2 sc in the first, and 1 sc in the following 3. Repeat to complete the round.


Now that you have a flat circle, you need a way to make it stand up! This is done by completing one round of sc's and then completing another round of sc's inserting the hook into the back of the stitch causing curvature of the piece (as seen in the picture on top).

The rest is actually quite simple, just continue to single crochet until the koozie is at your desired height!


I decided to add a handle for optimum koozie performance and did so by sc-ing into the base going through the existing stitches(I found that it was easier to do this while the koozie was on the bottle). I made the handle 4 sc thick. After making the first four sc, I then ch 1, flipped directions sc 4, ch 1, flipped directions, etc. I attached the end of the handle through the existing sc's 2 rows from the top of the koozie.

Lastly, I added a contrasting color to brighten up the piece and add some support. With the koozie on the bottle I went through the existing top layer sc's and added a sc to each one as tightly as possible to help keep the koozie from becoming loose at the top.
-Kay

Monday, February 13, 2012

Welcome!

Oh Dontcha Sew was started by three gals with an infatuation for the old, the crafted, and the edible. Each of us came from small town roots and have been looking for a way to share our love of lovely things with you. Expect to see projects, recipes, and ideas to make your heart flutter, brain tinker, and your stomach delighted. Happy Crafting!