Saturday, May 5, 2012


Hello fellow craft-lover lovelies! It has been a busy month for us ohdontcha's full of graduations, new jobs, etc. But we have been keeping busy with some projects as well! Here's just a little taste of the newest koozie addition to our Punk Rock Flea Market line-up! You can see this little koozie doozie, others, and US at the Punk Rock Flea Market next Sunday (ma's day). We will be there with our very own table full of vintage goodies and crafted items. So come say hi and visit all of the vendors (all 250 of them!) who will be participating this time around!


Venue Information:
THE PUNK ROCK FLEA MARKET-DOME
461 N. 9th St.
Philadelphia, PA, 19123
Sunday 5/13
10am-5pm
$3 entry


-Kay


Thursday, April 12, 2012

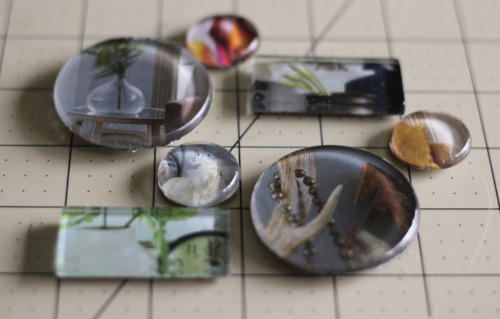
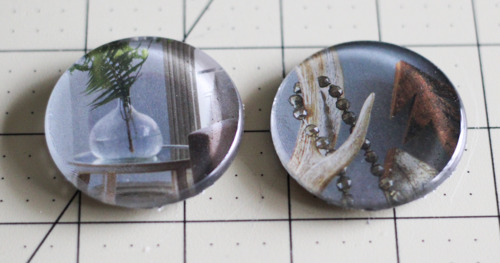
Magazine Magnets by 52 Weeks Project


Today 52 Weeks Project is going to bring you an easy DIY magnet made from magazines. I (Jill) have known Mae for almost 6 years now! I met her in Philadelphia during my time at the Art Institute. Mae is based now in the charming city of Portland, Oregon! I am so excited that she has started her blog about crafts.  Her blog is revolved around making 1 craft a week. I think it is a neat concept, because it keeps you doing a craft every week! She also has an etsy store called We the living devoted to her handmade cards. Her cards are adorable and I suggest you pick some up! Enjoy! 
What you’ll need:
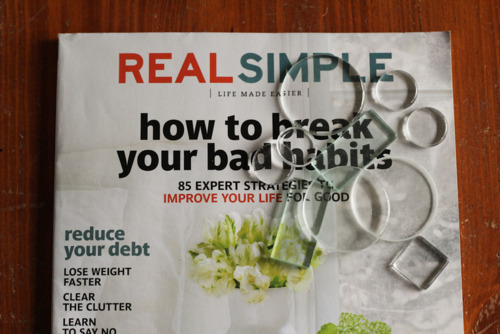
1. Clear glass
2. Diamond glaze (or another glass glue)
3. Magazine of your choice
4. X-Acto Knife
5. Magnets


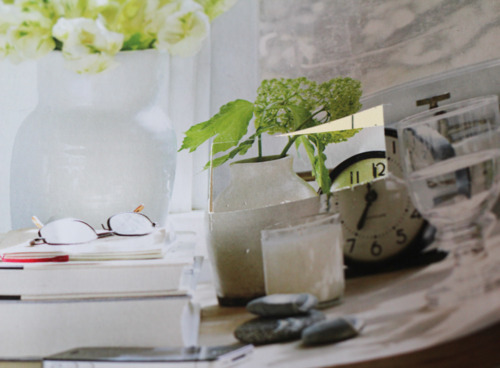
1. Trace around the glass with an X-Acto knife- pop out the desired section.

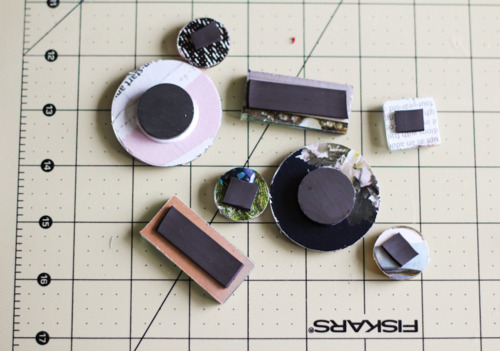
2. Using a brush, apply glue to the glass, then apply the paper. Once dry, you can apply your magnets.
 

Thank you Mae for this great craft! 
Happy crafting,
MissJillyBean

Monday, April 9, 2012

Thrifting Favorites: Segment 3


Hey ya'll, its Mia here with my segment of Thrifting Favorites. Over the past few days us girls here at Oh Dontcha Sew have been sharing a few of our favorite thrifted goodies. I know I can speak for all of us when I say we have so many loved pieces its hard to narrow them down in to one post. So I wanted to share with you all my favorite spring-ish pieces. Hope you enjoy <3


Here I have some of my favorite odds and ends. 
First on the left is a tiny milk glass vase. I have been collecting milk glass for a few years now and hope to some day have a entier hutch filled with it! Second to the left, is my favorite little owl trinket. Behind my little owl is a mug holder that I had purchased and repainted to transform it into a jeweler holder which was a fun functional little revamp. Lastly is this vintage Moran's Beverage bottle. This is a recent purchase of mine. I am a lover and collecter of vintage packaging. Vintage bottles are perfect for floral arrangements and add that little bit of extra character to any room or centerpiece. 


What screams spring more then bright and pastel floral patterns!?


Lastly 2 of my favorite wall art purchases.
The one on the left I purchased at my local goodwill for only $2! SAt the time it was a heinous sky blue with a vibrant crayon looking application of color on the flowers. But I knew I could save it (nothing a little spray paint and elbow grease couldn't cure!). On the right is a lovely hand embroider piece I also found at the goodwill for $4. I just love the idea that someone put time and love into something and that is one of the main reasons I love thrifting!

Untill next time!
-Mia

DIY Fruit Signs

Happy Easter! ( If you celebrate!) Unlike most, I spent the weekend working! It was a busy holiday for us working at a hotel. My mind spent most of the day planning projects in my head. This one included. I think when I work too much, my brain starts to wander in making other projects. I really can't help it! I have been thinking about making a vegan chicken salad for my other blog as well. I wasn't ever really a fan of chicken salad, but for some reason I have been craving it! This post is about fruit signs however and I will tell you how I made these signs! 

I am not sure how many of you indulged in fruit stampers as a kid. In kindergarten, we started with fruit stampers. SO with that being said, I was excited to try this as an adult. I thought it would be cool to make some signs that could hang in your kitchen. 


Paint, sponge brushes, fruit, paper! (If you decide to try out forks/ knives/ and spoons like I did, then very carefully, you need to hammer the spoon and fork flat before dipping in paint.) 


I decided to use wood letters for stamping! You can make your own stamps, OR buy stampers. These stampers were on sale at Michaels, and I liked the font, so I went with these. 


Dip your apples/ avacados/pears/ whatever fruit you use, in paint, and stamp away! I would choose fruits that have seeds. It will give it more of a shape on the paper. If it is just flat, with no holes, it will make it hard to tell what kind of fruit you are using!  I think even doing a fruit like starfruit would be a neat look!  I really liked this canvas type paper I found, it gave it more of a rustic look.

Finished product! 


Happy stamping! 
Miss Jillybean


Thursday, April 5, 2012

Thrifting Favorites: Segment 2


All of my thrifted items are special to me. I believe that anything you search for, unexpectedly come across, alter, salvage, or bring back to life will bring you more satisfaction than any run of the mill item ever can. That being said, here are a few of my all time faves..


This. This thing right here. I came across this at my local salvation army and was immediately smitten. I don't even use it to hold anything substantial (hence its use as a rubber-band holder), but the floral pattern is to die for. This is actually the pattern I intend to get tattooed on myself in the near near future.


This shirt right here was reincarnated from the life of one poor ugly dress that I came across at the sazz vintage warehouse (which you must must must visit). I am obviously a sucker for floral print, and this one was too good to pass up. I cut the dress in half, made the top into a crop top and I am currently converting the bottom half of the dress into a skirt.


Lastly, whenever thrifting I always keep my peepers open to awesome fabrics. Even if that fabric happens to be constructed into the most horrendous, boxy, ten times too large pair of overalls, it can be recycled into something awesome and more flattering. Fabric is killer expensive, but buying an article of clothing containing awesome fabric from a thrift store is not. Here's a few of my faves that consist of a boxy button up, a too long velvet dress, and old curtains.


-Kay


Wednesday, April 4, 2012

Thrifting Favorites


I wanted to share some thrifting favorites of mine on this Wednesday. Wednesday is a large thrifting day mainly because most places are 1/2 off! So who wouldn't take advantage? The girls will also be sharing their special picks throughout the next couple days!


This skirt I found for a dollar and think about often cutting off the top so I could make it shorter. The pattern on the bottom is too good to cut off. Also: the seafoam green and pink is such a great color combination. 

This shirt I found for 3 dollars. It has teapots on it? I know! How weird? But neat. The label on it says "Weathervane". I wondered if it was from that store the Weathervane that used to be in most malls. I feel like its a little too off the wall to be found in a weathervane.  The scarf next to it I found for 50 cents, and I love! The shapes on it are perfect along with melon color. 

These aprons! I found these with Mia at a Flea market, but I have to talk about them. We plan on doing a DIY project with our aprons in the near future. So be sure to keep your eyes peeled for that! It will be super cute!

This skirt I found for 1 dollar! The pleats and polka dots are so great! I wear it out alot when I go out for drinks or dinner at night! 

These three items line my vanity, and a shelf that my grandfather made my grandmother hanging on my wall! The Beligan Creme's box holds notes, and letters (even some cute love letters) I have received over the years! The Diane Pins were a find that Mia and I came across in a flea market. We shared the pack, and she was sweet enough to let me keep the box!  Even though using them in my hair is quite hard, I do try! If I had more of a bouffant all the time it would be great to use! I have been into collecting old perfume bottles lately. If you click on this picture you can see that there is a rose that sits on top of the bottle. Its so cute! It's actually broken but I couldn't pass it up!

Ah! This bag! I found at Goodwill, and I loveeee love the bridge on it! I really do not use it quite often mainly because I don't wear too much brown, or neutral shades. The only time I ever used it was when my sister had her baby! ( I stocked myself full of games for the long wait!) But I will most definitely use it more. 

Thats all! Check back for Mia and Kay's favorites!

Miss JillyBean

Friday, March 30, 2012

DIY Lace Sash Belt

Ello!
I have created a quick DIY lace belt that I wanted to share with you!                               


 Supplies you need:
- Lace Fabric (I purchased mine from Jo-Ann fabrics for 9 dollars!)
- Thread (Preferably a kind that matches your lace)
-Sewing needle


1. I bought my fabric in a yard length. Now, I really like the way the scallops were on the top and bottom of the lace. So, with that said, I measured the lace around my waist to see how much I needed. Since, I wanted the top and bottom of the scallops to line my waist. I cut off how much I needed for my waist, and cut the fabric in half. I sewed the two pieces of fabric together!


2. After sewing the two pieces of fabric together, create an accordion effect on the end and sew closed ends.

3. Next, cut out your sashes for the back. You can cut as long as you choose. I wanted to be able to tie a bow with the sashes or just tie a knot! Also, I cut two v's into the ends of the sashes.


This project was a DIY while I was stuck in house trying to rest! I took some pictures out of on the bridge today wearing it!  It was warmer out then I expected! I think the lace popped with my red dress!


 Have a good weekend!
-Jillybean